
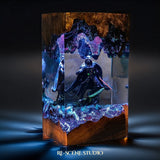


![[FATHER'S DAY] Ember Glow Ticket | $6.68 — Handcrafted Epoxy Resin LED Lamp | Unique Ambient Decor & Collector's Gift](http://rescenestudio.com/cdn/shop/files/Lucky_Star_Ticket_NYE_2026_c61361fc-ea06-4a31-8379-e16ed7d47902.jpg?v=1767177179&width=500)

How a Resin Lamp Goes from Sketch to Glow

You click "add to cart." Some weeks later, a glowing diorama arrives at your door, packed in foam and wrapped like a gift. The resin is crystal clear. The LED light inside casts colors you didn't know a lamp could make. And somewhere in the back of your mind, a question forms: how was this thing actually made?
It's a fair question. Most products ship from a warehouse shelf. Resin lamps don't. Every single one is built by hand, layer by layer, over the course of days. Understanding how a resin lamp is made changes the way you look at the finished piece. It stops being "a cool lamp" and starts being something closer to a sculpture with a heartbeat of light.
This is the full process, from blank paper to glowing art.
Step 1: The Sketch
Every lamp begins as a pencil drawing. Before resin is poured, before LEDs are wired, an artisan sits down with reference material and starts sketching the scene that will eventually live inside the cube.

This isn't a quick doodle. The sketch phase determines the entire composition of the lamp. For a Hollow Knight lamp, the artisan maps out where the Knight will stand, how the ruins of Hallownest will frame the background, and where the light should enter to create depth. For a Dragon Ball piece, the energy beams, character poses, and layered landscape all get planned on paper first.

Scale is the trickiest part. The finished lamp might be only 15 to 20 centimeters tall, so every element needs to work at miniature proportions. A tree that looks perfect on paper might overwhelm the scene at actual size. An outstretched hand might be thinner than a matchstick.
Most designs go through two or three revisions before the artisan is satisfied. Some complex scenes, like multi-character battle dioramas, can take a full day just in the sketch phase.
Step 2: Sculpting the Miniature
Once the sketch is locked, the artisan begins sculpting the physical elements that will sit inside the resin. This is the most labor-intensive step, and it's where mass-produced lamps and handcrafted ones part ways completely.
Every character, every rock formation, every tree trunk is sculpted by hand. The artisans use a combination of polymer clay, fine wire armatures, and specialized sculpting tools smaller than dental picks. A single figure might take four to six hours to complete, depending on detail.
Think about what goes into a scene like a Demon Slayer diorama. The character's pose needs to match the reference art. The haori pattern is painted by hand with brushes that have three or four bristles. Flame effects around a sword are shaped from translucent clay, thin enough to let LED light pass through later.
For nature-themed lamps, like the Sunflower or Cherry Blossom designs, the sculpting process shifts. Petals are formed individually and layered to create a realistic bloom. Stems are wrapped wire, painted in multiple thin coats to avoid visible brush strokes.
The key difference between handmade and factory-produced lamps lives right here in the sculpting. Factory versions use injection-molded parts, which means every unit is identical. Handcrafted pieces vary slightly because human hands shaped them. That's not a flaw. It's the whole point.
Step 3: Pouring the Resin
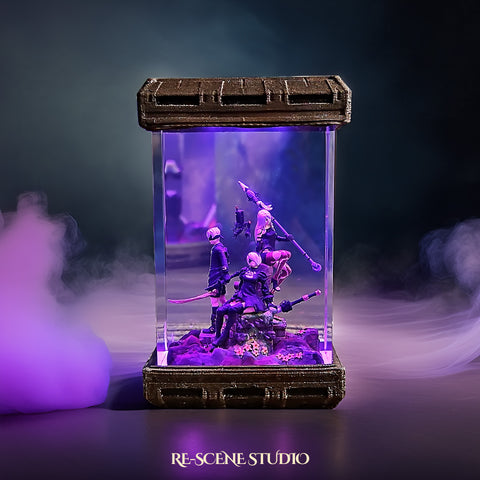
This is the step most people think of when they hear "resin lamp," and for good reason. The pour is where the magic becomes visible.

Resin pouring is not a single event. It's a multi-day process done in layers, and rushing any layer ruins the entire piece. Here's how it works.
The artisan places the sculpted miniature into a silicone mold and begins the first pour. This bottom layer is typically mixed with pigments or dyes to create the base environment. For an ocean lamp, this might be deep blue gradients. For a forest scene, greens and browns blended to suggest earth and canopy.
Each layer needs 8 to 12 hours to partially cure before the next pour. If you pour too soon, the layers blend into a muddy mess. If you wait too long, the bond between layers weakens and you risk delamination over time. The timing window is surprisingly narrow.
A typical lamp requires three to five separate pours. Complex pieces with multiple color zones can require seven or more. Between pours, the artisan checks for bubbles, adjusts color saturation, and makes sure the sculpted elements haven't shifted position in the mold.
Bubbles are the enemy. Even tiny air pockets can create visible imperfections in the finished piece. The workshop uses vacuum chambers and pressure pots to pull air out of the resin before and during curing. It's a step you'd never see in a cheap mass-production setup, but it's the difference between cloudy resin and crystal clarity.
The total curing happens over the course of days, with each layer fully setting before the next is added.
Step 4: Sanding and Polishing
The lamp comes out of the mold looking rough. The surfaces are cloudy, the edges are sharp, and there's usually a thin film of uncured resin on the outer faces. This is normal. The real transformation happens during sanding.

The artisan begins with coarse grit sandpaper, around 200 to 400 grit, to flatten any uneven surfaces and remove mold lines. Then they work progressively finer: 600 grit, 800, 1000, 1500, and finally 2000 grit for a pre-polish finish.
Each grit level removes the scratches left by the previous one. Skip a level, and you'll see scratch marks in the final product. The artisans spend 45 minutes to over an hour on sanding alone, depending on the piece.
After sanding comes polishing. A polishing compound is applied with a buffing wheel, and the resin surface goes from matte to glass-clear in a matter of minutes. This is the moment where you can finally see the scene inside with full clarity. Colors pop, light refracts properly, and the sculpted elements look like they're suspended in solid glass.
For lamps with flat display faces, the artisan also flame-polishes certain edges. A quick pass with a controlled flame melts the very top layer of resin, filling in micro-scratches and creating an almost liquid-smooth finish. It requires a steady hand and precise timing. Too long, and you warp the piece.
Step 5: LED Integration
A resin lamp without light is just a paperweight. The LED base is what transforms a static diorama into something that glows, shifts, and fills a room with color.
The base unit houses the LED array, a USB power connector, and in some models, a remote-controlled color-changing module. The artisan fits the cured and polished resin block onto the base, checking alignment so the light enters the resin at the correct angle.
Light placement matters more than most people realize. Resin refracts light in predictable ways, so the artisans position LEDs to create specific effects. For an ocean lamp, the light enters from below to simulate sunlight filtering through water. For a character lamp, side-lighting creates dramatic silhouettes and depth.
Every lamp is tested for at least 30 minutes of continuous operation. The artisan checks for even light distribution, color accuracy, flickering, and heat output. LED technology runs cool, which is important because resin can yellow over time if exposed to sustained heat. The LEDs used in Rescene Studio lamps are rated for 50,000-plus hours of operation without significant color degradation.
If any issue is found during testing, the lamp goes back. It doesn't move forward to packaging.
Step 6: Quality Check and Shipping
Before any lamp leaves the workshop, it goes through a multi-point inspection. This is separate from the LED test. It's a dedicated visual and structural check.

Frequently Asked Questions
Featured Resin Lamps
Handcrafted with care — each one unique


Every lamp we create carries a piece of our heart — a small universe of light, resin, and imagination, handcrafted in our workshop for someone across the world who shares our love for these stories.