![[FATHER'S DAY] Ember Glow Ticket | $6.68 — Handcrafted Epoxy Resin LED Lamp | Unique Ambient Decor & Collector's Gift](http://rescenestudio.com/cdn/shop/files/Lucky_Star_Ticket_NYE_2026_c61361fc-ea06-4a31-8379-e16ed7d47902.jpg?v=1767177179&width=500)

Best Home Office Lighting for Video Calls and Less Eye Strain

If you work from home and look washed out on video calls, struggle to read your screen by 4pm, or get a tension headache every afternoon, your office lighting is the culprit. Most home offices were never designed for sustained screen work or video conferencing. They were spare rooms, dining nooks, or guest bedrooms repurposed during 2020 with whatever overhead light was already there.
The good news: fixing it costs under $200 and takes a single afternoon. This guide walks through the three-layer lighting setup that professional remote workers, content creators, and video producers actually use, adapted for a regular home office budget.
Why Default Home Office Lighting Fails Both Tests
The default home office setup is one bright overhead ceiling fixture, usually a 4000K-6500K cool white LED. It's the same fixture you'd find in a kitchen or hallway, optimized for visibility, not for sustained work or appearance on camera.
For video calls, this overhead light creates harsh top-down shadows on your face. Your eye sockets go dark, your nose casts a shadow on your upper lip, and your forehead reflects more light than your cheeks. The result reads as "tired, sick, or stressed" to anyone watching, even if you feel fine.
For eye strain, the cool blue-tinted light combined with the bright overhead position fights against your monitor's brightness. Your eyes constantly adjust between the cool overhead and the warmer screen, which causes the muscles around your eyes to fatigue. By 3-4pm, you're squinting without realizing why.

The 3-Layer Home Office Lighting Solution
Professional video producers and photography studios use a system called three-point lighting: a key light, a fill light, and a backlight. You don't need a studio version. You need a $50-150 home office adaptation.
| Layer | Purpose | Recommended Tool | Approx Cost |
|---|---|---|---|
| Key light | Main illumination, primary face light for video calls | Ring light or LED panel mounted at eye level behind the monitor | $30-100 |
| Fill light | Softens shadows on the opposite side of your face | Small desk lamp at 45-degree angle on the opposite side | $20-60 |
| Backlight / accent | Adds depth and visual interest to the background frame | Floor lamp or warm accent piece behind/beside you | $30-150 |
You don't need all three on day one. Start with the key light, which fixes 80% of the video call problem. Add fill and backlight over time as budget allows.
Step 1: The Key Light (Most Important)
The key light is what fixes your face on camera. It needs to come from in front of you, slightly above eye level, pointing at your face from a distance of 18-36 inches. Mounted behind your monitor, angled down toward your face, is the ideal position.
The two main options:
- Ring light: A circular LED with adjustable brightness and color temperature. Affordable ($30-80), easy to position, very flattering. The mild downside: rectangular reflection in your glasses if you wear them.
- LED panel: Rectangular flat panel light, often used by streamers. Better for glasses-wearers, more diffuse light, slightly more expensive ($60-150).
For color temperature, set the key light to 4000K-5000K during work hours. This is "neutral white" and matches typical office lighting expected on professional video calls. After 6pm, drop it to 3000K to ease into evening warmth and reduce blue light exposure before bed.
Step 2: The Fill Light (Optional but Powerful)
The fill light softens the shadow created by your key light. Without fill, the side of your face away from the key light goes dark, which reads as "broody" or "intense." With fill, your face looks balanced and natural.
You don't need a dedicated fill light. A small desk lamp positioned at a 45-degree angle on the opposite side of your monitor works perfectly. Set it to roughly half the brightness of your key light. The goal is subtle, not equal.
For the simplest approach: any existing desk lamp you already own can serve as fill light if you angle it correctly. If you don't have one, IKEA, Wayfair, and Amazon all have $20-40 options that work fine.
Step 3: The Backlight or Accent Layer
The backlight is what separates a "presentable home office" from "this person clearly thought about their setup." It adds depth to the frame visible behind you on calls and creates visual interest beyond your face.

Common options: a small warm-toned floor lamp behind you, a backlit shelf or plant, or a handcrafted accent piece on a console table behind your chair. The light source should be warm (2700K-3000K) and dim, not bright. The point is atmosphere, not illumination.
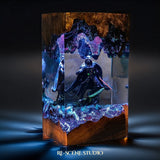
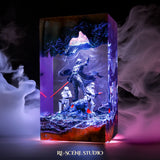
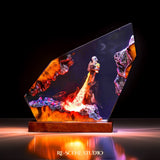
Handcrafted resin pieces work particularly well in this role because they glow from within rather than projecting light outward. The warm internal LED creates a small pool of ambient warmth that reads beautifully on camera without adding glare or distraction.

How to Reduce Eye Strain (The Other Half)
Eye strain is a separate problem from video call appearance, and it requires different fixes. The core issue is brightness mismatch: your monitor is bright (300-400 nits typical), your room is dim, and your eyes constantly adjust between them.
The fix is to bring the room brightness up to roughly match your screen. This does not mean blasting overhead lights. It means adding multiple medium-warm light sources at different positions around the room so the overall ambient level rises to comfortable parity with your screen.
Eye Strain Reduction Checklist
- Match brightness: Raise room ambient light so your screen doesn't feel like a flashlight in a dark cave
- Match color temperature: 4000K during work, 3000K after 6pm to ease into evening
- 20-20-20 rule: Every 20 minutes, look at something 20 feet away for 20 seconds
- Bias lighting: A warm LED strip behind your monitor reduces contrast strain
- Screen brightness: Lower it. Most monitors ship at 100% which is too bright for indoor use
For a deeper look at how blue light specifically affects evening work and sleep, our guide on blue light and sleep covers the science. Our broader piece on common lighting mistakes covers what to avoid in any room, not just home offices.
What External Tools and Brands Are Worth Buying
Brand recommendations to start your search: Elgato Key Light for a premium streamer-grade setup ($200), BenQ ScreenBar for a clamp-on monitor light that doubles as a desk lamp ($80-150), or IKEA's work light range for budget-friendly options under $40.
For ring lights specifically, brands like Neewer and Lume Cube on Amazon cover the budget-to-mid-range. For LED panels, Aputure offers professional options that overlap with photography use.
Monitor Calibration: The Other Half of Eye Comfort
Lighting is half the eye comfort equation. Monitor calibration is the other half. A perfectly lit room with a poorly calibrated monitor still causes eye strain by forcing your eyes to constantly adjust between the bright screen and the surroundings.
Three monitor settings to check tonight: brightness, color temperature, and refresh rate. Most monitors ship at 100% brightness, which is calibrated for retail showroom display, not indoor home office use. Drop brightness to 60-75% during the day and 30-50% at night. Set the monitor color temperature to match your room (warm if your office leans warm, neutral if it's neutral). For refresh rate, anything 60Hz or higher is fine for productivity work; gamers and content creators benefit from 120Hz+, but it's not necessary for video calls or document editing.
Software helpers like f.lux (free, mac/windows) or built-in Night Shift (mac) and Night Light (windows) automatically warm your screen color temperature in the evening. Combined with smart bulbs that warm the room lighting in parallel, you get a coordinated wind-down effect that reduces eye strain dramatically by the end of the day.

Posture and Light Position Together
Lighting interacts with how you sit, which affects how lighting hits your face on camera and how much eye strain you accumulate. The basics: monitor at arm's length, top of the screen at or slightly below eye level, light sources never directly behind your monitor (creates a halo effect), never directly in front of your monitor (creates screen glare).
The simplest fix for monitor glare is repositioning either the monitor or the offending light source. If you can't move either, anti-glare monitor films cost $15-30 and reduce reflections without affecting image quality. For severe glare from a window, blackout curtains or window film during work hours solve the problem entirely.
Frequently Asked Questions
Featured Resin Lamps
Handcrafted with care — each one unique
Every lamp we create carries a piece of our heart — a small universe of light, resin, and imagination, handcrafted in our workshop for someone across the world who shares our love for these stories.